If you have Outlook 2010 and would like to setup your POP account in this older version of outlook you can do so. iONLINE Recommends Office 2019 or 2016 however all versions of outlook from 2010 and up are currently supported.
- Open Microsoft Office Outlook 2010.
- Go to File > Info > Add Account.
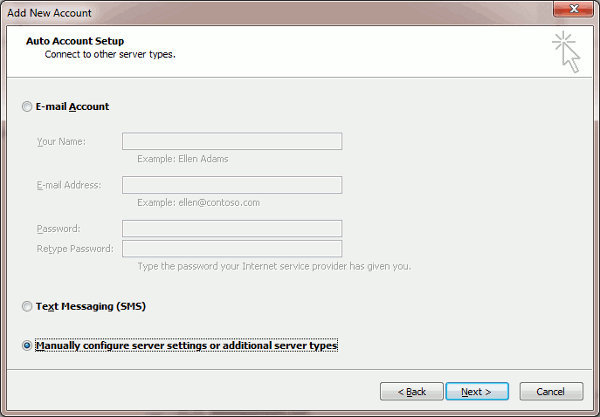
- Select the checkbox Manually configure server settings or additional server types. Click Next.
-
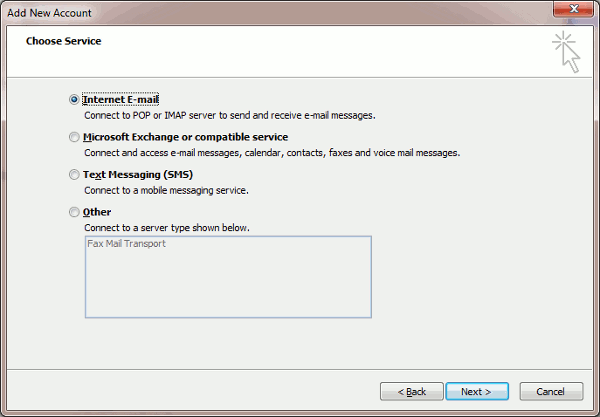
Select the Internet Email option and click Next.
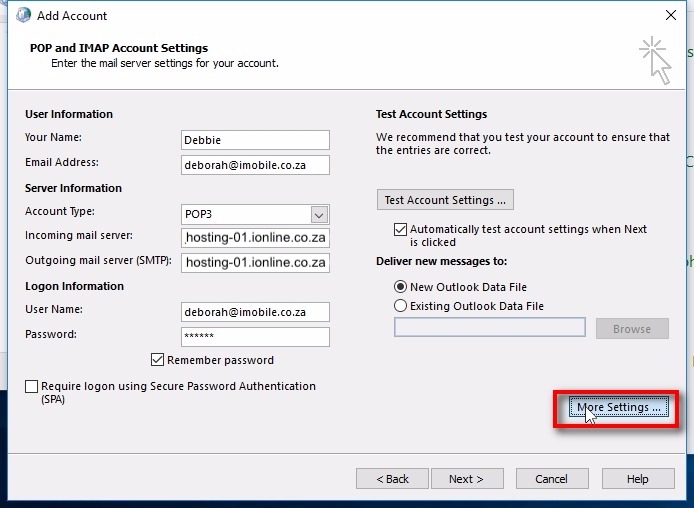
- Specify the following:
- Your name.
- Your email address.
- Account type. If you want to keep copies of messages on the server, select the POP3 option.
- Incoming mail server: hosting-01.ionline.co.za
- Outgoing mail server (SMTP): hosting-01.ionline.co.za
- User Name. Specify your full email address. Example: johndoe@example.com.
- Password. Most likely, this password coincides with the password you use for logging in to Plesk.
- Require logon using Secure Password Authentication (SPA). Leave this option cleared.
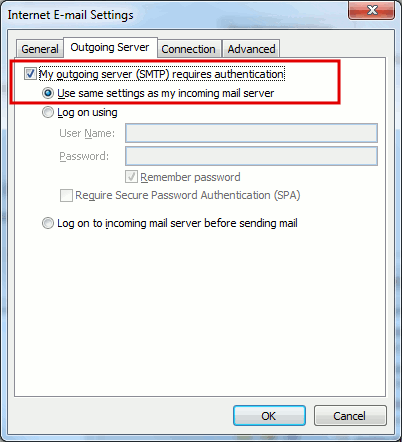
- Click More Settings, open the Outgoing Server tab and check My outgoing server (SMTP) requires authentication.
- Click Next.
- Click Finish.
You have successfully set up your POP account on Outlook 2010 for Windows.
If you have any issues please contact iONLINE Support vie our help centre or call our support team for telephonic assistance.
Edwin Watson
Comments